Version 6.0.0.0 - 10 Jan 2025
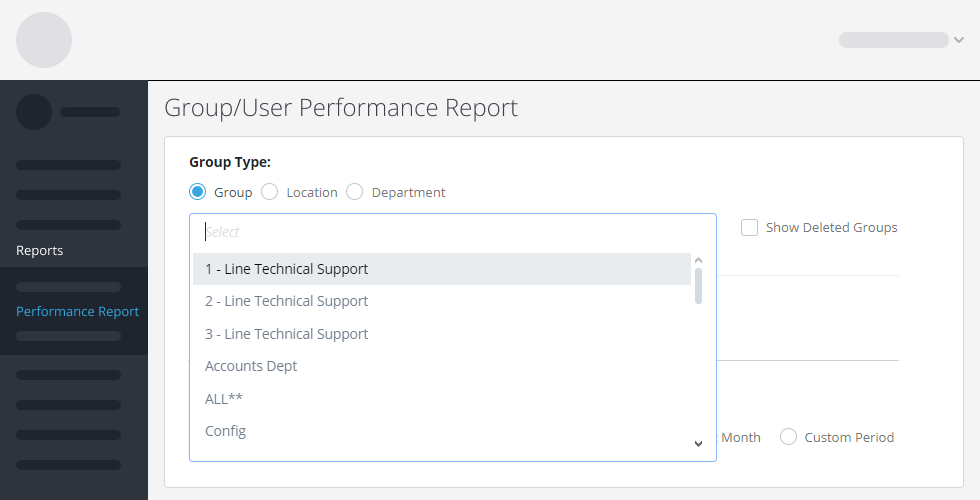
Enhanced Performance Report
Gain deeper insights into your team’s responsiveness with our upgraded Performance Report:
- Granular Data Filtering: Utilise the new dropdown feature to select specific Locations, Groups, or Departments, allowing for more targeted analysis.
- Customisable Time Periods: Choose precise date ranges to evaluate performance trends over time.
- Visual Data Representation: Access easy-to-interpret charts and graphs that highlight response patterns and areas for improvement.
- Exportable Reports: Generate and download comprehensive reports for stakeholder presentations or internal reviews.
This enhancement empowers decision-makers with actionable intelligence to optimise crisis response strategies.
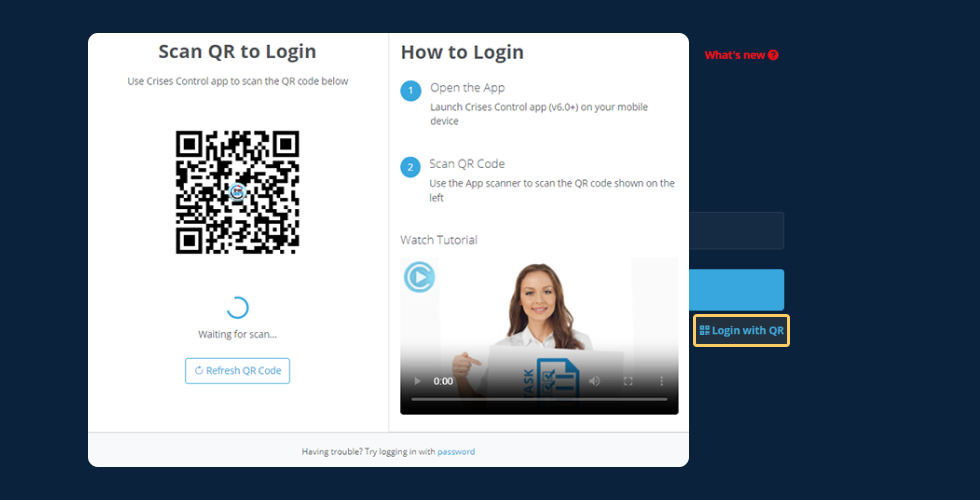
QR Code Login to the Web Portal
Logging into the Web Portal is now easier with the new Mobile App. Simply go to the Navigation bar at the top left-hand side of the screen in the app and select Login With QR. On the Web Portal, click Login with QR, then scan the QR code using the Mobile App and you’ll be logged in seamlessly.
- One-Step Authentication: Simply scan the QR code displayed using your Mobile App to Login to the Web Portal.
- Time-Saving Login: Eliminate the need for manual username and password entry, reducing login time significantly.
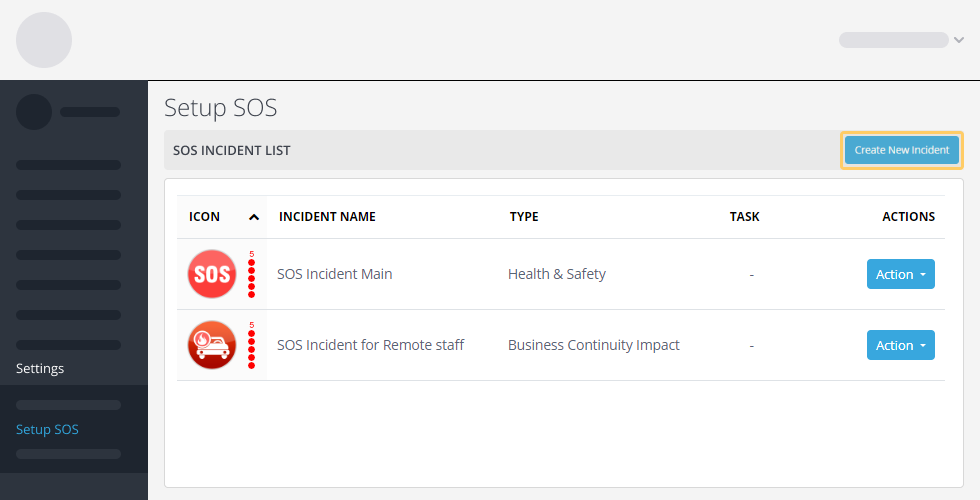
SOS Templates
Enhance your emergency response capabilities with our new SOS Templates feature. You can now create multiple templates for different SOS situations, responder groups and much more. This allows for faster and more efficient responses during emergencies.
This feature empowers your team to respond swiftly and effectively to a wide range of SOS emergency scenarios, potentially saving lives and minimising damage.
Version 5.7.0.2 - 16 Aug 2024
Custom Logo
You can now personalise the portal by adding your company’s logo. Simply follow these steps:
Step 1:
- Go to Settings > Global Configuration > System Tab.
- Scroll down until you find the OEM Branding option. Set it to Yes and save the changes.
Step 2:
- Navigate to Settings > Setup Company.
- Look for the Company Logo option at the bottom left-hand side, upload your company logo, and save the changes.
After logging out and logging back in, your company logo will appear above the Navigation bar.
Multi Company Login
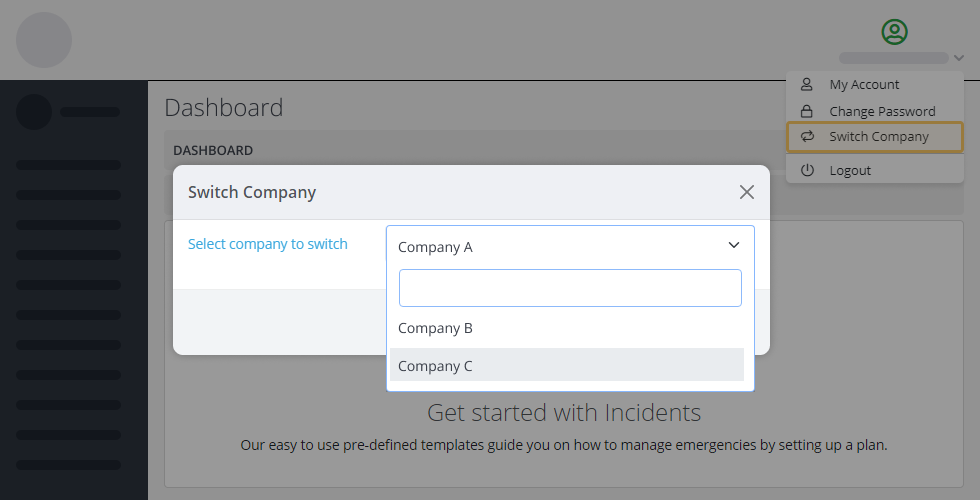
We now support Multi-Company login, allowing users to register and manage multiple companies within the same region. With this feature, you can easily switch between companies without needing to log in again.
To use this feature, simply click on your name at the top right-hand corner of the screen and select Switch Company. You will be prompted to choose the company you’d like to switch to. After making your selection, click on the Switch button, and the system will redirect you to the chosen company instantly.
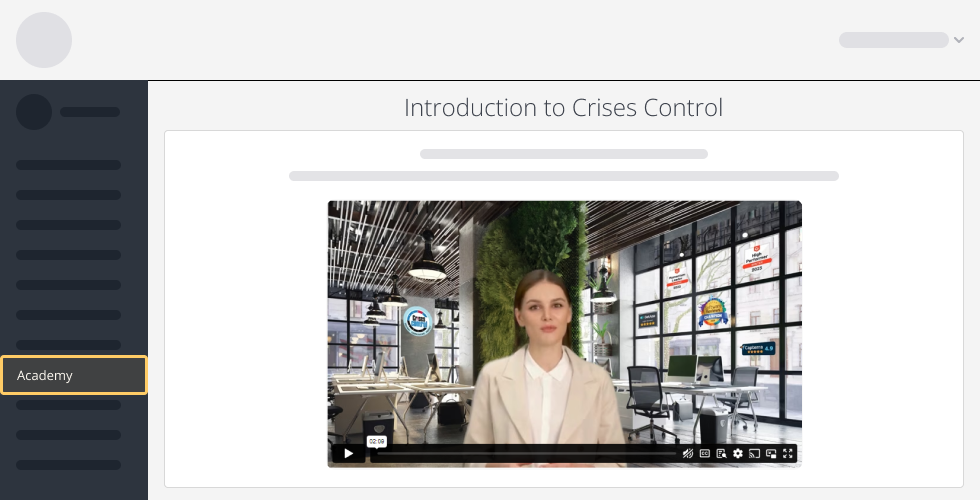
Academy is now a stand-alone module
We’ve updated the Academy Module by removing the dropdown and making it a standalone Module. Along with this change, we’ve added the “Take a Tour” option, previously found in Quick Start, below the Ping and Incident videos. This feature allows you to watch the video and then follow a step-by-step guide through the Module.
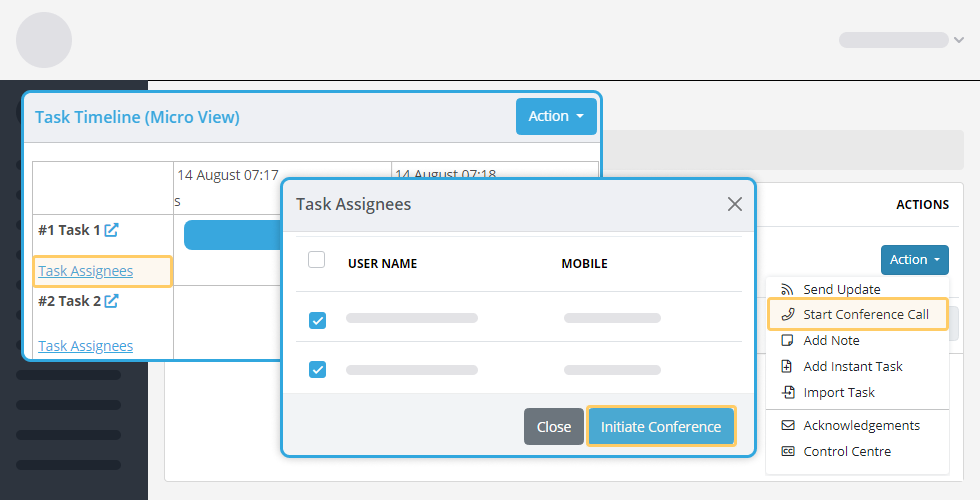
Initiate a Conference call with Task Assignees
You can now initiate a conference call directly with assigned users for a task from the Task Assignees option in the Control Centre. This feature provides the Incident Manager with quick and easy access to start a conference call with task assignees whenever they need to gather more information regarding the Task.
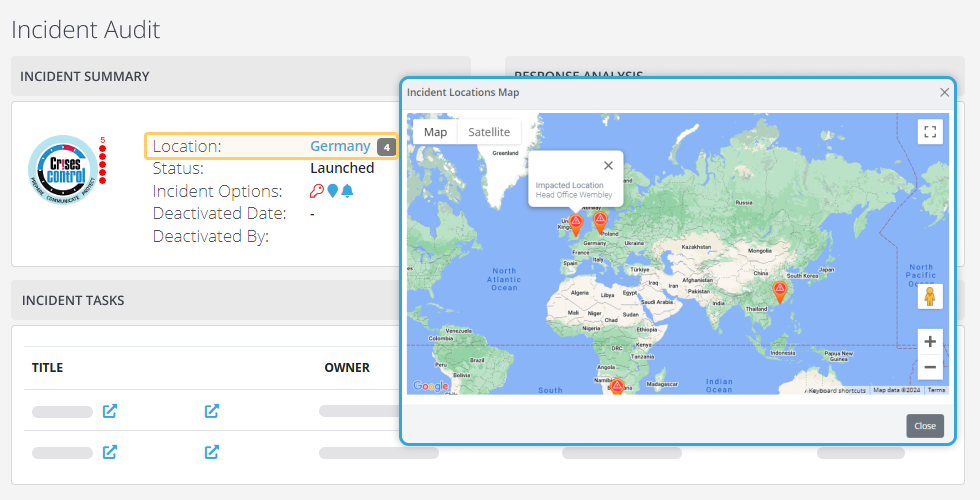
Improved Incident Audit Log
We have updated the Incident Audit Log by adding a new feature. You can now click on locations to open a popup with a map that displays all impacted locations selected at launch.
Task Status
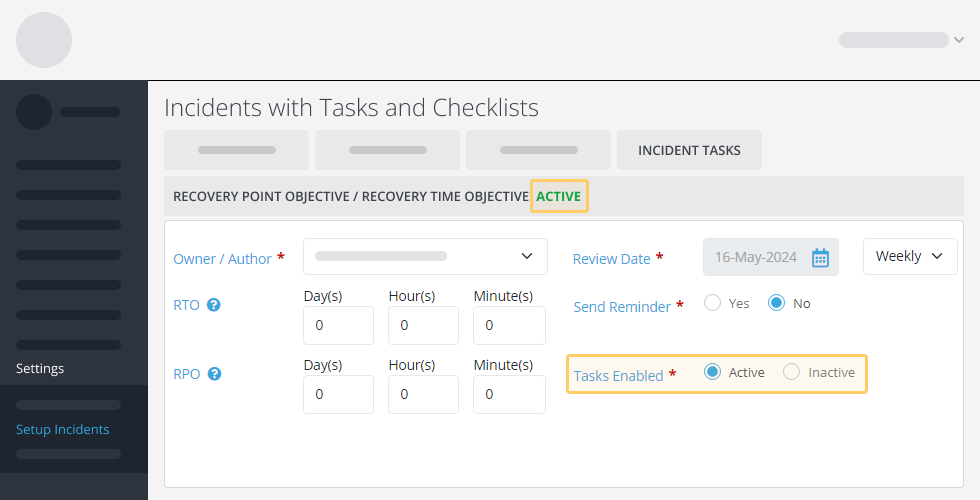
We have added a new section on the Task Setup page to help users quickly identify whether tasks are Active or Inactive. To view this, navigate to Settings > Setup Incidents > Incident Task Tab. On the dropdown for RPO and RTO at the top of the page, you can easily see the status of the Incident Task. If a Task is inactive, simply click the dropdown, switch the Task Enabled option to Active, and save your changes.
Email Templates
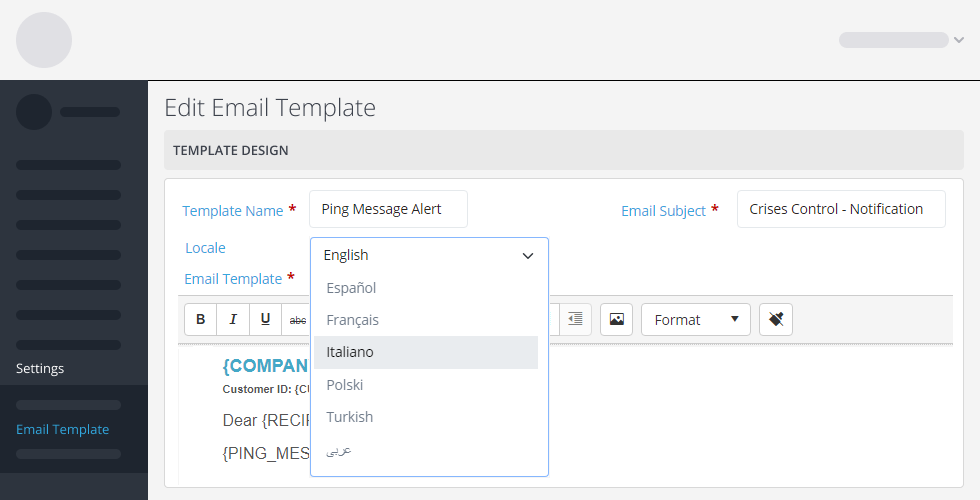
We’ve updated the Email Templates feature to allow users to edit templates in their preferred language. To customise an Email Template in a specific language, navigate to Settings and select the Email Template option. Once on the Email Template screen, choose your desired language from the dropdown menu in the top right-hand corner. You can choose one of seven languages, English, Spanish, French, Italian, Polish, Turkish and Arabic.
Channel Templates
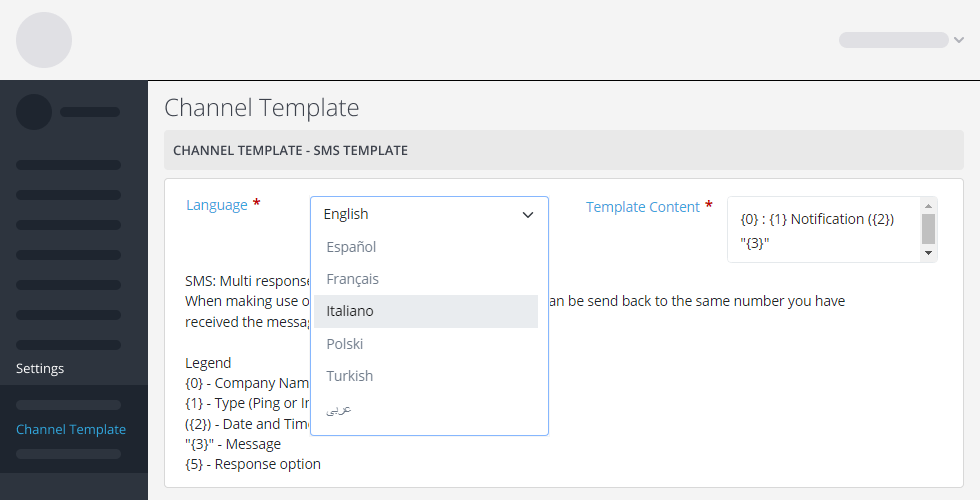
We’ve added a new section in the Settings menu that allows users to customise SMS and Voice templates for notifications received by users. To make the most of this feature, follow these steps:
- On the login screen, select your preferred language, then log into the system. You can choose one of seven languages, English, Spanish, French, Italian, Polish, Turkish and Arabic.
- Go to Settings > Global Configuration > Communications Tab. Scroll down to the Default Language for Communication option and choose your desired language for the system.
Next, navigate to Settings > Channel Templates. Select the language you want to edit by choosing the appropriate option from the dropdown in the top right-hand corner of the page.
QR Code Registration
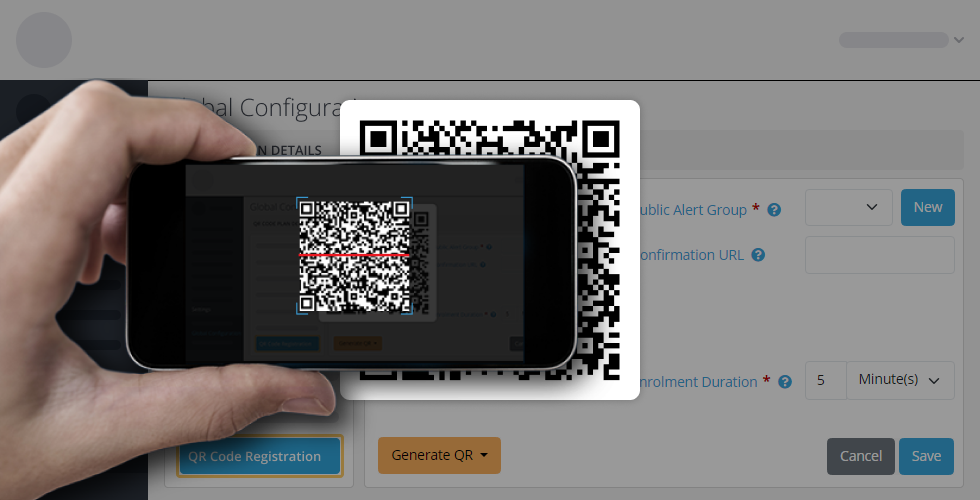
The QR Code Registration feature is a powerful addition to the system, offering two key functionalities: User Registration and Visitor Registration.
User Registration:
This feature allows users to register by scanning a QR code with their mobile device. The QR code directs them to a page where they can fill in their details and submit them for approval. Once approved, they are automatically added to the system. This is ideal for registering permanent and temporary staff, interns, or contractors. This simplifies the registration process, eliminating the need for Admin users to manually add individuals or updating and uploading spreadsheets every time a new user needs to be added to the system.
Visitor Registration:
This feature integrates with the Public Alert Module, this enables companies to provide a QR code for daily visitors who wish to receive notifications. When a visitor scans the QR code, they are redirected to a page where they can enter their mobile number. After submitting their information, they are added to a specific Public Alerts list. If an Incident occurs, the person managing the Incident can choose to notify these visitors. To do so, simply navigate to the Public Alert page, select the desired group to notify, and after clicking on the next button, the system will proceed to the messaging page where you can enter the message that you would like to send out, then the user can proceed to send out the alert.
Version 5.7.1.0 - 17 May 2024
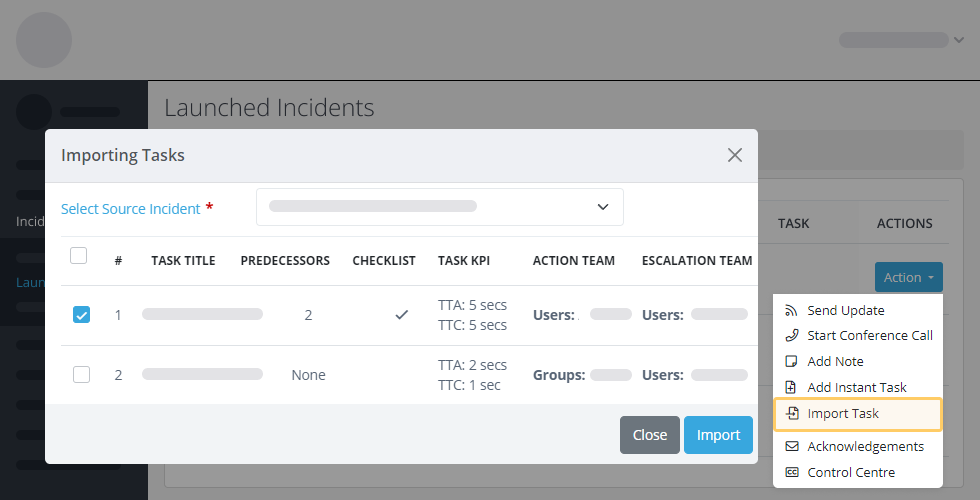
Import Tasks
Users can import Tasks from another Incident containing Tasks directly into the Incident they have chosen. This new feature make it easier for incident manager to add task that did not exist on the on the fly and during the life cycle of the Incident.
- No more wasting time recreating existing tasks! This feature streamlines your workflow by efficiently incorporating relevant tasks from past incidents.
- Improved Consistency: Ensure consistency across incidents by importing tasks that have already been defined and standardised.
- Reduced Errors: Minimise the risk of errors by eliminating the need to manually re-enter task details.
- Enhanced Collaboration: Facilitate collaboration by allowing teams to leverage past knowledge and best practices captured in existing tasks.
To utilise this feature, simply click on the [Action] button of the desired Incident, then select the “Import Task” option.
The user will be presented with a screen to choose the Incident they wish to import Tasks from and then a list of Tasks they want to import. When importing a Task all the attributes of the imported task will be carried across.
By leveraging this new task import feature, you can significantly improve the efficiency and accuracy of your incident response process.
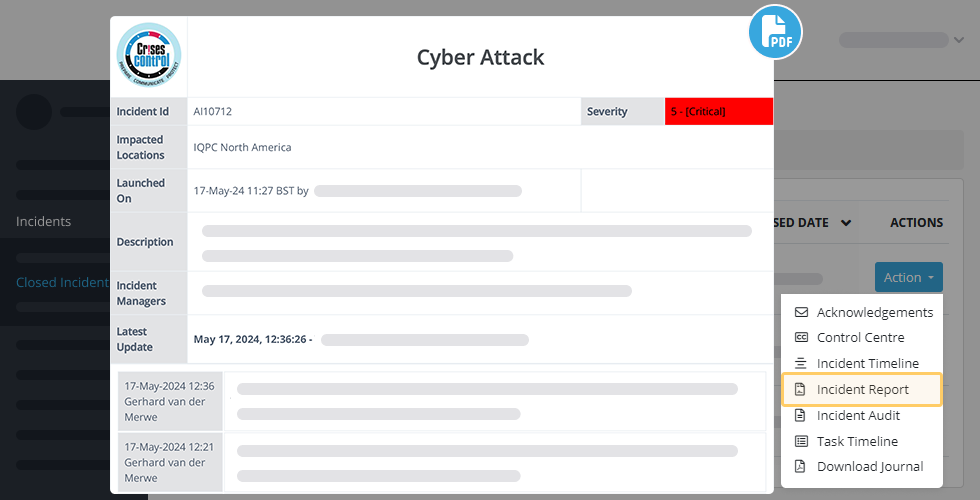
Incident Report Editor
Managing the information flow from for different stakeholders, such as responders in the field, mid-level managers, and senior management can be a challenge when all efforts are diverted to resolving the issues. They want to be kept informed and updated at regular intervals with clear and concise Incident Report.
We’ve introduced a new feature that streamlines incident reporting for incident managers and improves communication with stakeholders.
- Incident managers can now create and distribute incident reports more efficiently.
- Real-time notes and comments from responders associated with tasks or checklists on the report can be easily incorporated.
- This eliminates the need for manual editing and saves valuable time.
- For stakeholders who want to be kept in the loop, the system can distribute the incident report at predetermined intervals, automatically prompting the incident manager when it’s time for an update.
For example, if C-level executives want an update every 30 minutes, the incident manager will receive a notification to prepare and distribute the latest report.
By improving the efficiency of incident reporting and communication, this new feature can help to ensure that all relevant parties are informed and up to date on the status of an incident.
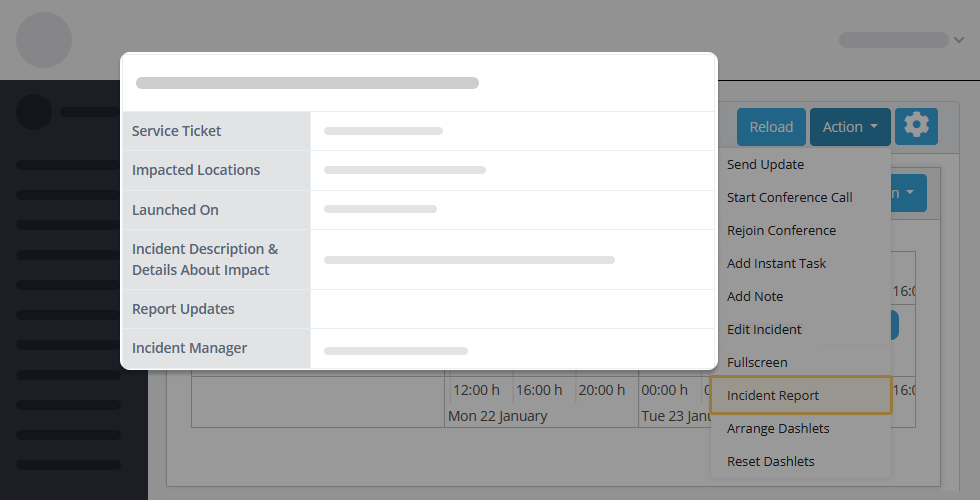
To use this feature Simply navigate to the Incidents, click on the [Action] button and choose “Incident Report” to view.
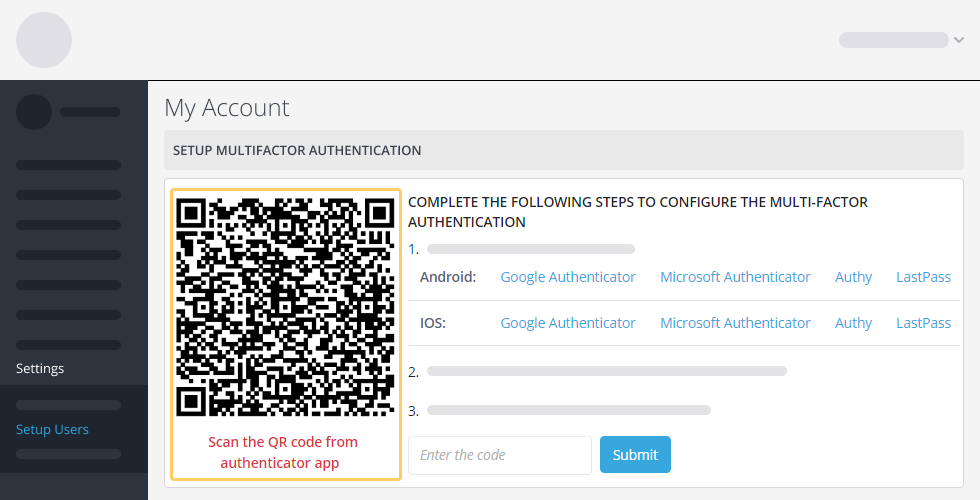
Using Authenticator Apps for additional layer of protection
There are a number of App and browser based plugins that can be used to sign into the Crises Control Portal, for example Google Authenticator, Microsoft Authenticator etc. By using these authenticator tools (to sign in) they can provide an additional layer of protection to your account. To use this feature, simply install the authenticator app of your choice on your browser and mobile phone.
Sign into Crises Control and go to [Your Account] at the top, click on the dropdown menu, select “My Account,” and then follow the steps in “Setup Multifactor Authentication” section.
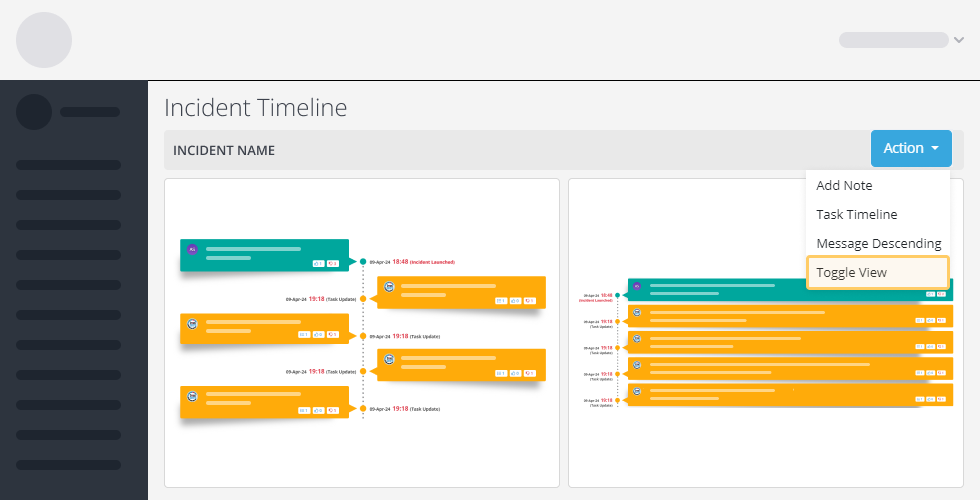
New Incident Timeline View
Switch between two different views of the Incident timeline. Use the [Action] button in the Incident Time line and select “Toggle View” to switch views.
Task Gantt Chart
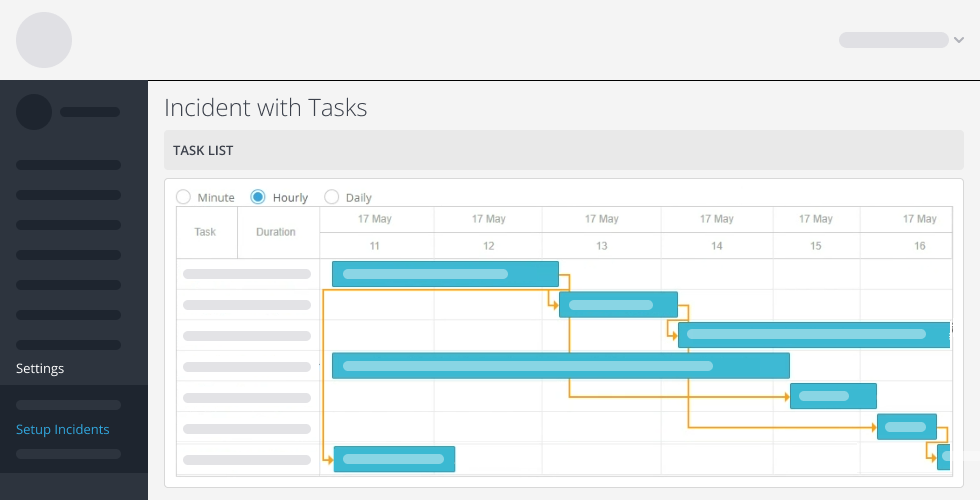
We’ve introduced a Gantt chart view, located below the Task list, this is a visual representation of Task duration, dependency and order of execution. This is useful for planning and scheduling projects. They help you assess how long a Incident should take to resolve, determine the resources needed, and plan the order in which to complete Tasks.
More Training Videos in the Academy
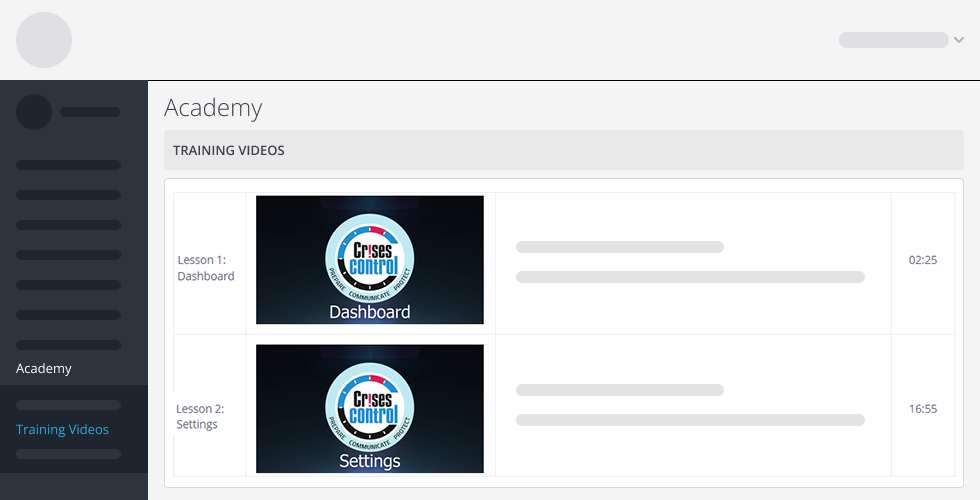
Whenever you require a quick refresher on system functionalities or seek comprehensive training materials for new staff members, these new training videos can support user awareness and learning. They serve as learning resources to enhance user proficiency of the system.
View All People Associated with the Incident
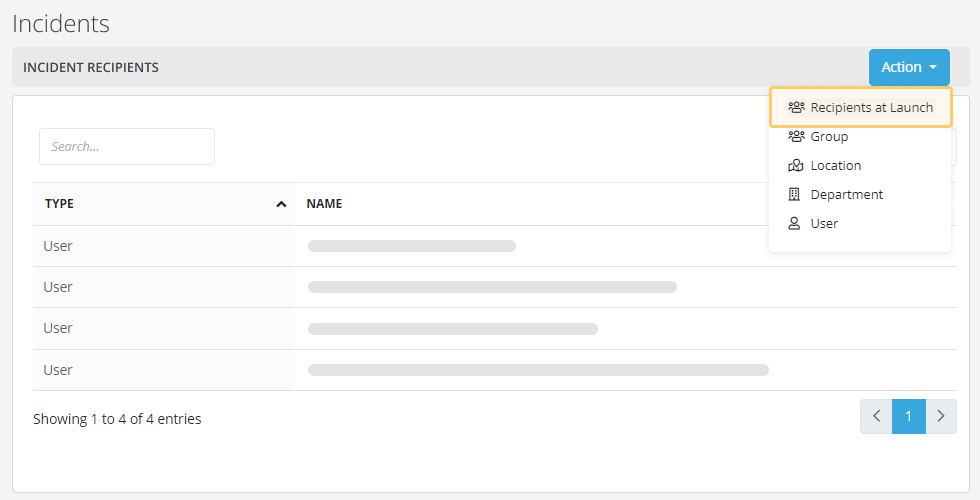
You can now view all recipients involved in an incident. This is aggregated list of the people irrespective of their Location, Department or Group. Simply navigate to the Incidents, click on the [Action] and choose “Recipients at Launch” to view. Use this functionality to pinpoint specific recipients involved in that Incident.
Switch Timezone View
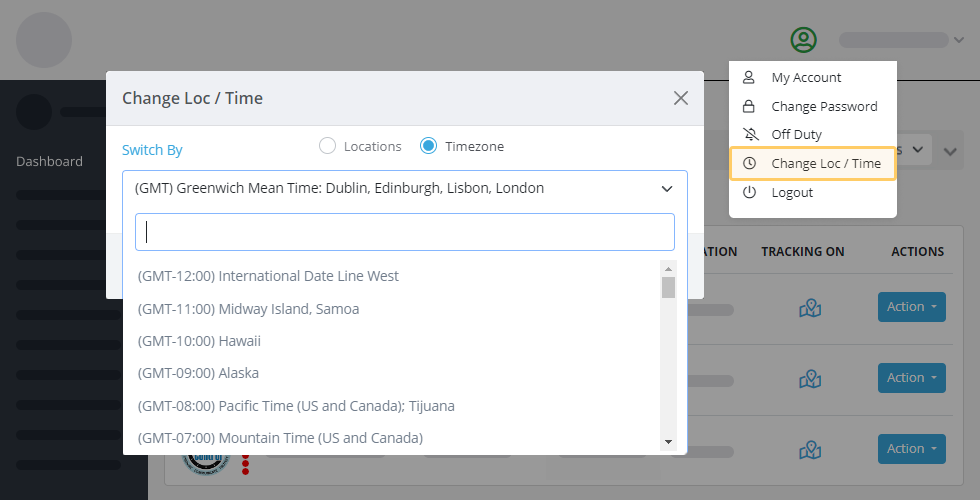
We have added a new view titled “Change Loc / Time,” Incident management, especially when coordinating across different time zone locations can use this option, display time data in the time zone of your choices. For example if an incident occurred in 12:00 hrs GMT in London but you are based in New York USA, your time zone is ET (North America) the time value displayed would be 12:00 GMT, by using the new option and selecting your USA location, the incident occurred time value displayed changes to 07:00ET (North America).
The option is available [ Your Account] at the top, click on the dropdown menu, select “Change Loc / Time,” and then choose the appropriate location and/or time zone.
Version 5.7.0.0 - 2 Feb 2024
Create Response Options
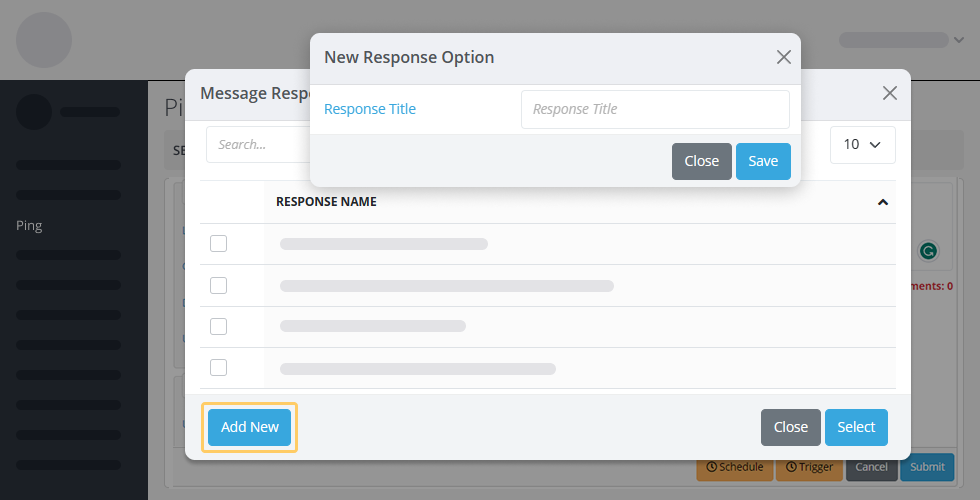
We have refined the Response Options functionality, enabling sender of an alert to create new response options, if it doesn’t already exist, which the alert recipient can select. This enhancement provides users with greater flexibility and ease in tailoring their communication and responses.
Delivery Report Showing Cascading Plan
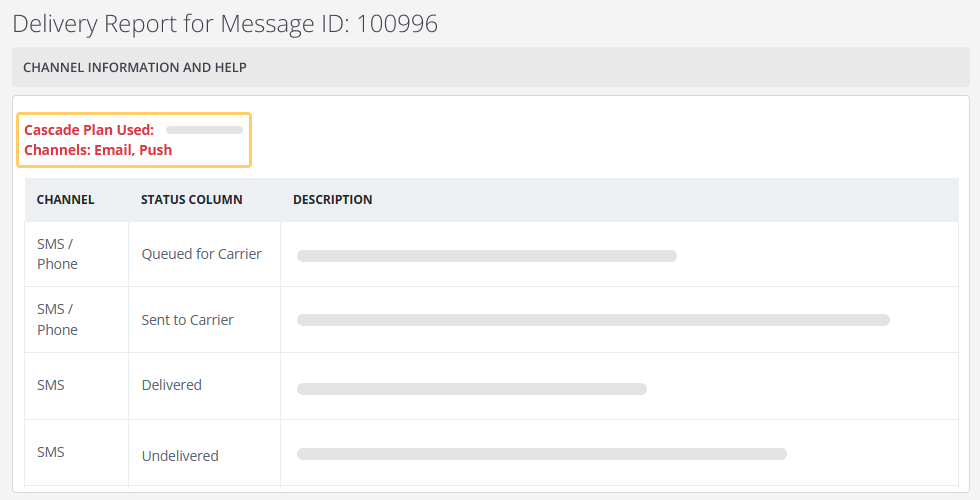
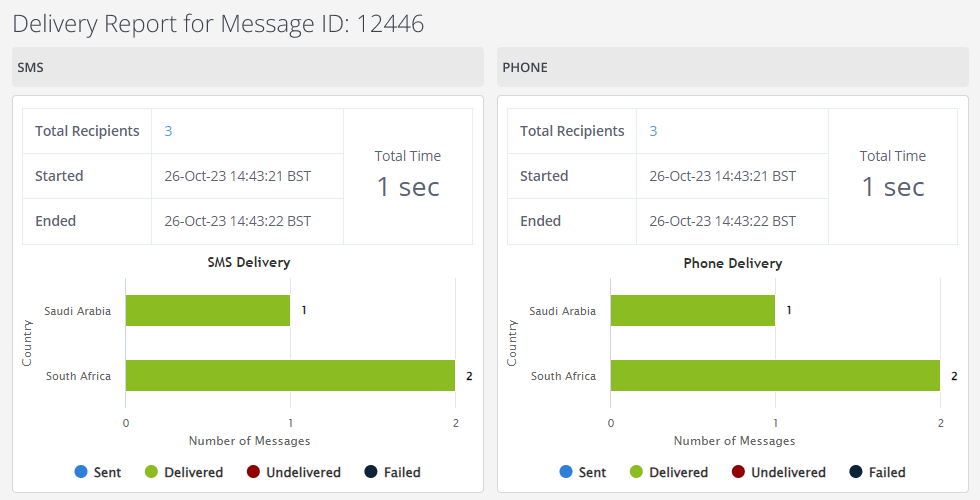
We have extended the functionality of the Delivery Report to include details if a Cascading Plan was used. A Cascading plan distributes and staggers the delivery of a mass communication message across different communication channels. If no cascading plan is used, then an alert will be sent across all the selected communications channels simultaneously.
If an alert is sent to users, it is now possible to see if a Cascading plan was used or not.
Bulk Add Users to Groups / Locations / Departments
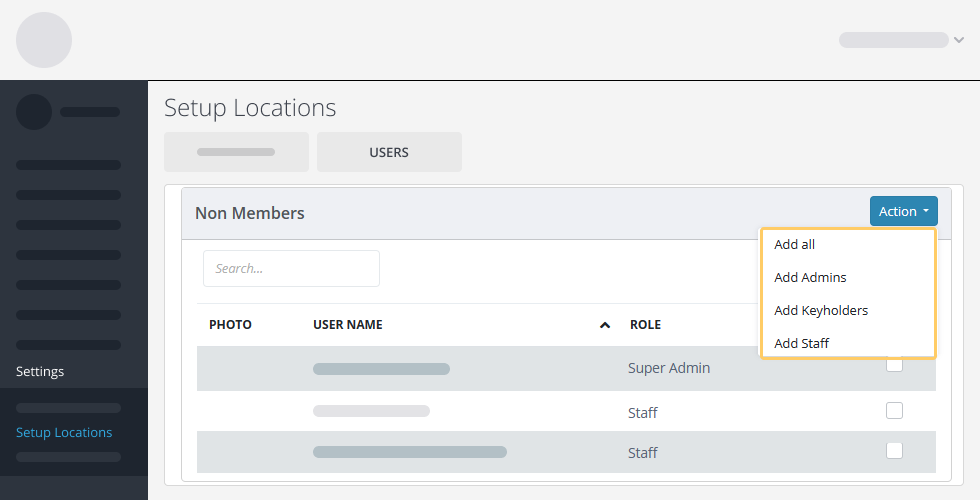
We have introduced a user-friendly functionality that simplifies the process of adding members in bulk to Locations, Groups, or Departments. To utilise this feature, navigate to the specific Location, Group, or Department, edit the entity, and go to the Users tab. Click on the action for Members or non-members and choose the desired action. This enhancement streamlines the user onboarding and management process, providing a more efficient way to manage members across various entities.
Default Communication Channels for Task Completion
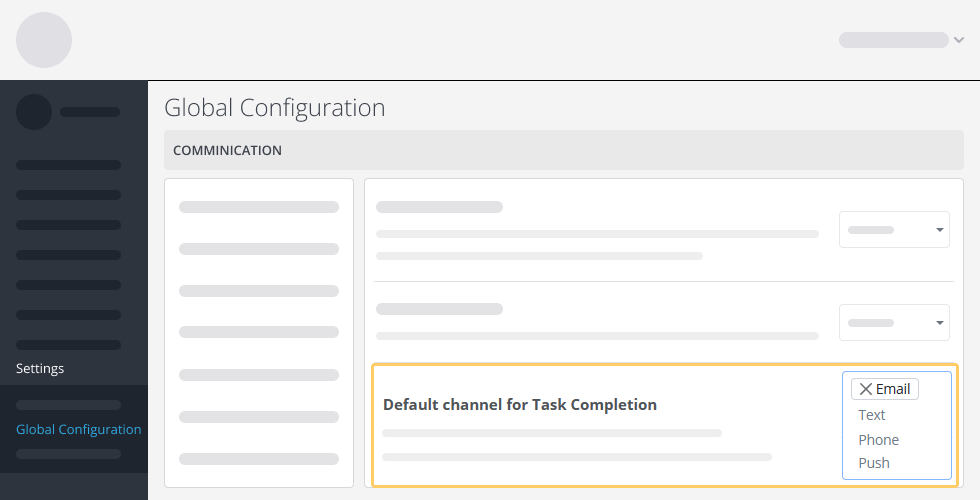
This option will allow you select the default communication channels (SMS, Email, Phone or Push) for when a task is completed. It is worth noting that users still retain the flexibility to add more communication channels if needed when sending task completion updates.
Update Live Incident Details
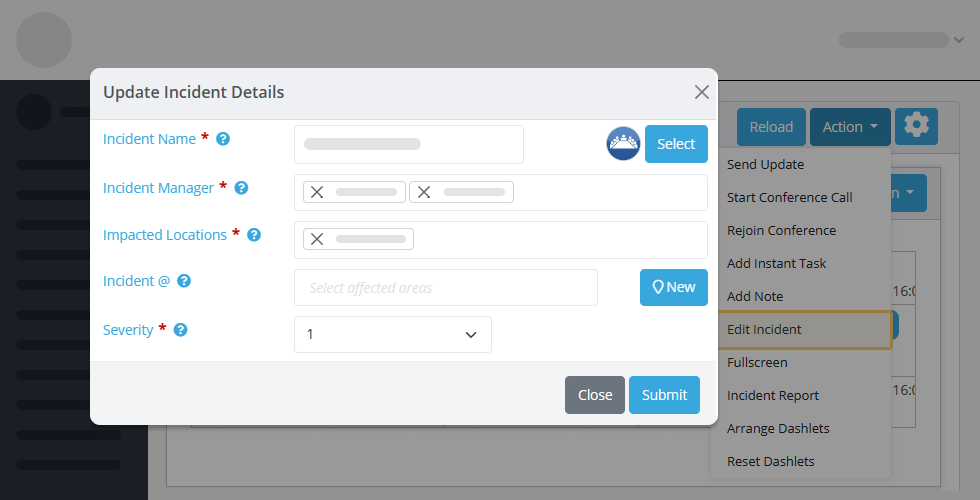
We have introduced a new feature for Incident Managers. Now, they can update and active incident details, this is limited to; Incident Name, Incident Managers, Impacted Locations, Incident @ Locations, and adjust the Incident Severity & Icon. This added functionality empowers Incident Managers to maintain precise and up-to-date information, contributing to a more effective incident management process.
Incident Creation
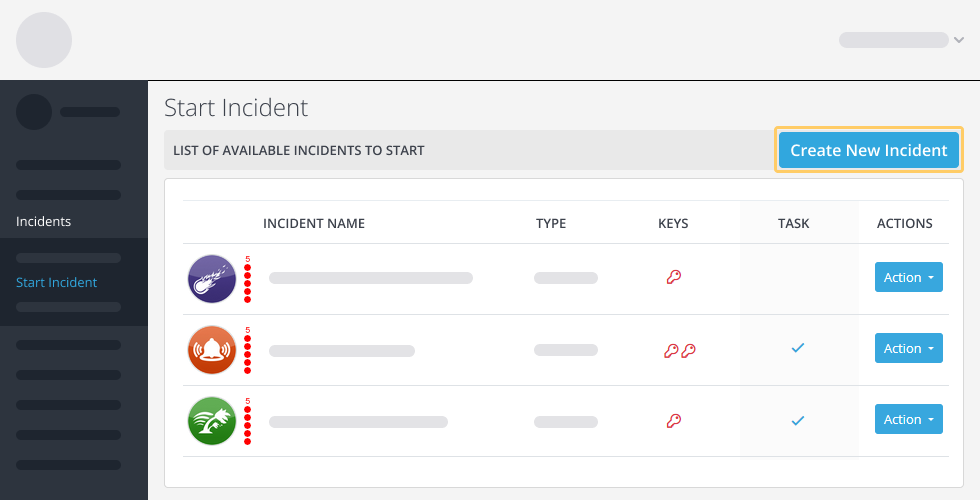
We have improved the Incident Module to simplify the process of creating a new incident, instead of selecting from Active Incident list. A new shortcut button “Start Incident” now allows users to create a new bespoke incident with ease. This enhancement aims to streamline workflows and provide a more flexible incident management experience.
Incident Report
This is a new Incident Report for incident managers and keyholders. The reports provide a simple and easy to understand “current status” of any incident that is live. It contains a chronology of the incident actions, by way of summary, created by the incident manager. This report printed or emailed to stakeholders manually in real-time or at scheduled time for distribution automatically.
Version 5.6.2.0 - 27 Oct 2023
TASK Checklist Improvements
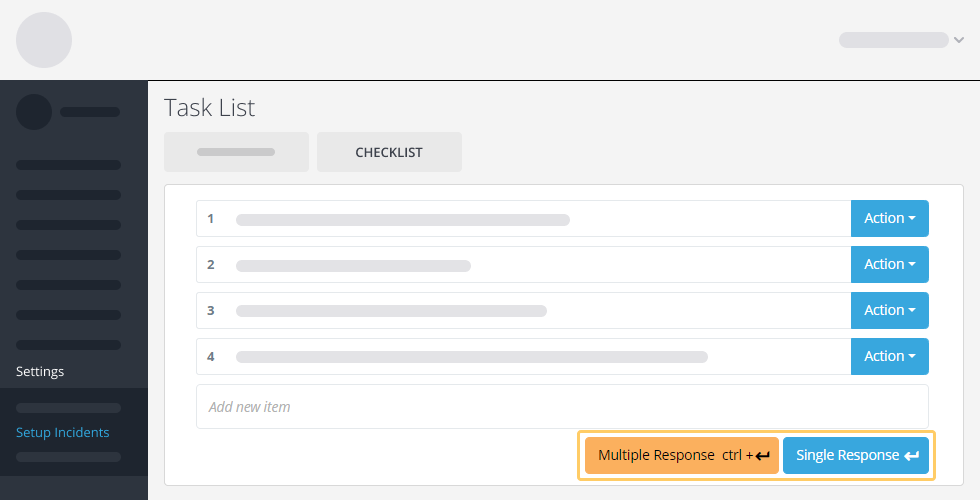
We’ve made a significant improvement to the process of adding checklist items to your TASKS. Now, when you create a checklist items, you have the ability to select the response type. You can choose between ‘Multiple Response’ or ‘Single Response.’ With this new enhancement, you can streamline your processes and improve the overall user experience.
A TASK is assigned to you
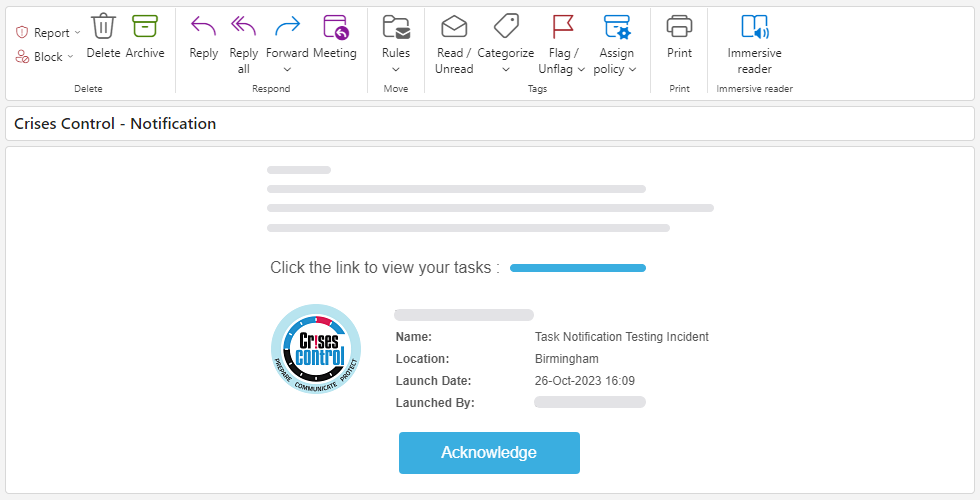
When an incident with Tasks have been initiated, we have improved the communication channels to the recipients with tasks assigned to them, informing them over all communication channels with an extra message line informing them that they have tasks assigned to them.
Now, when an incident is initiated, our system ensures that recipients are informed promptly and effectively. In addition to the standard notifications, we’ve added an extra message line to the notifications. This special line is designed to catch their attention, clearly stating that they have TASK assigned to them. This ensures that the recipients are fully aware of their responsibilities and can take prompt action, contributing to a more efficient and responsive incident management process.
Dashboard Graphic Display Changes
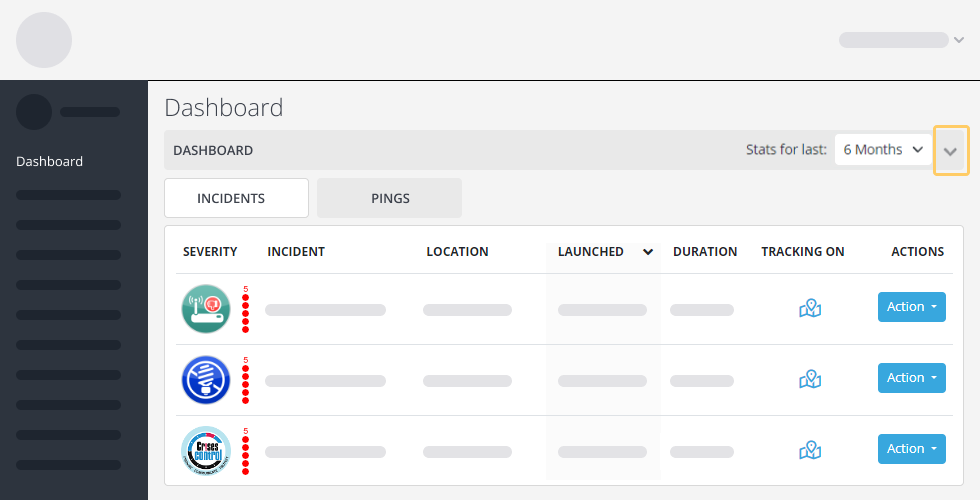
The Dashboard has been optimized to provide users with improved loading times. Minimizing the Dashboard Graphs by default, while still keeping the ‘Response By Channel’, ‘’ & ‘’ allowing users to review the information opening up the Dashboard Chevron.
We’ve fine-tuned the Dashboard to make it faster, reducing loading times and enhancing user satisfaction. Our optimisation strategy includes minimising the Dashboard Graphs by default, just click the expand icon to view the graphs. Enjoy a snappier, more efficient dashboard experience!
Say Goodbye to Spelling Mistakes: we've polished your Crises Control Portal and App
We understand that little typos can sometimes lead to big problems. That’s why we’ve spruced up the Crises Control Portal and App to fix any spelling mistakes that might have slipped through the cracks.
Global Configuration Upgrade
We’ve not only fixed those pesky typos but also refreshed the setting titles and their descriptions. These changes are aimed at enhancing the overall clarity of your configuration, making it crystal clear for all users what each configuration option means.
Version 5.6.0.0 - 4 Aug 2023
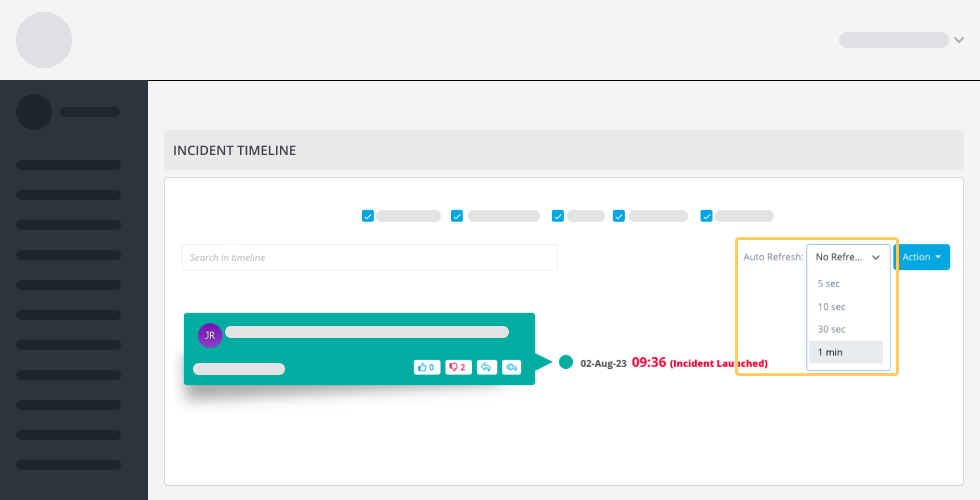
Incident Timeline - Auto Refresh
Enhancements have been made to the incident timeline, introducing a user-friendly feature that enables the selection of predefined time intervals. This improvement ensures automatic and continuous refreshing of the page, keeping the incident timeline up-to-date with newly added information as the incident progresses.
With this new functionality, users can now effortlessly stay informed about the latest developments during an ongoing incident. By selecting a specific time duration from the list, the page will automatically refresh itself after the chosen period has elapsed. This seamless updating process guarantees that any new data, events, or changes are promptly reflected on the incident timeline, providing real-time insights into the unfolding situation.
Incident Timeline - Ascending / Descending Messages Filter
We are pleased to introduce an exciting new enhancement to the incident timeline – the ability for users to sort messages in either ascending or descending order. This additional functionality empowers users to customize how they view the timeline, tailoring it to their specific needs and preferences.
With this feature, users can effortlessly switch between sorting options. By selecting the ascending order, messages will be displayed from the earliest to the latest timestamp, allowing for a chronological view of the incident’s progression. Conversely, opting for the descending order will showcase messages in reverse, from the most recent to the earliest, providing a quick overview of the most recent developments.
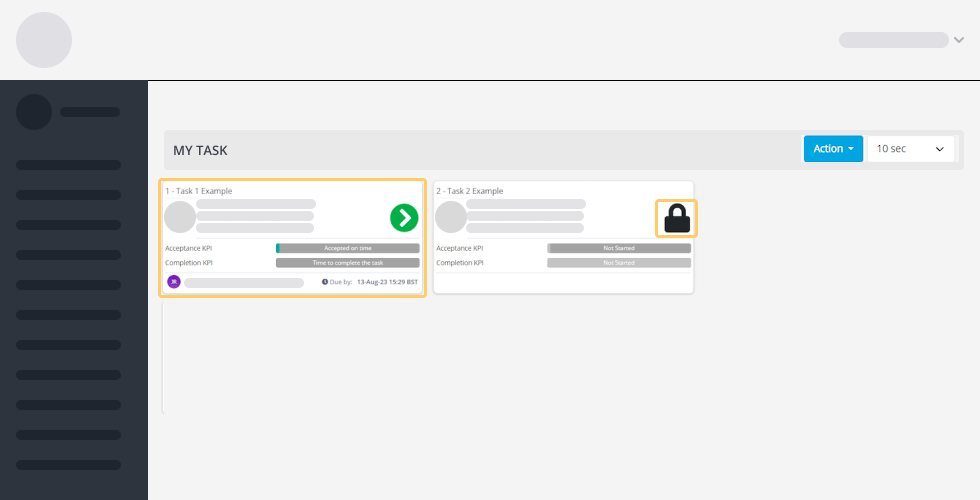
Assigned Task Details Dash-let Update
With the enhancements, users can quickly and easily identify current tasks which require actions and those tasks that are temporarily locked and unavailable for action. This helps users with coordination and accountability during incident management.
This improved clarity in task details streamlines the workflow, enabling faster decision-making and smoother collaboration among team members.
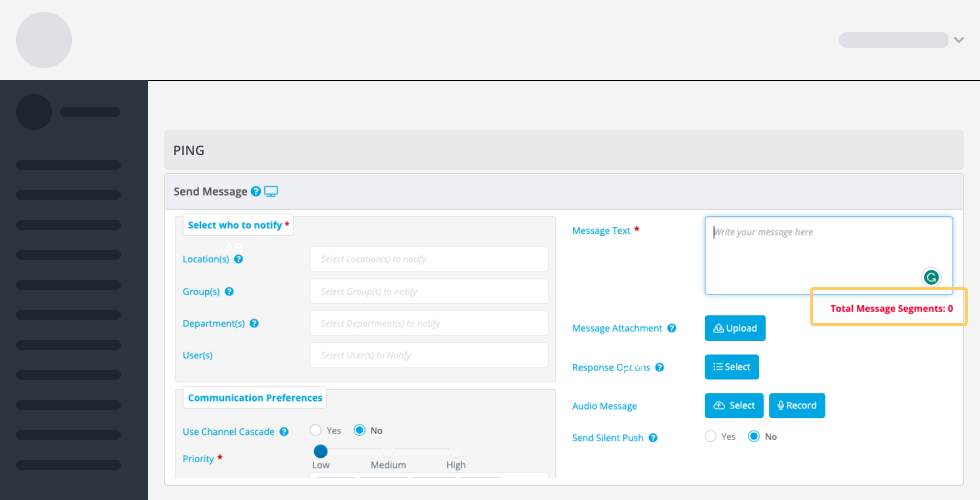
SMS Message Segment Calculator
A message segment counter has been added beneath the message box areas, allowing a user to see the number of SMS segments that their message will be use.
With this handy feature, users can now keep track of how their messages will be segmented before sending. The message segment counter can help users can craft their messages precisely to minimise cost.
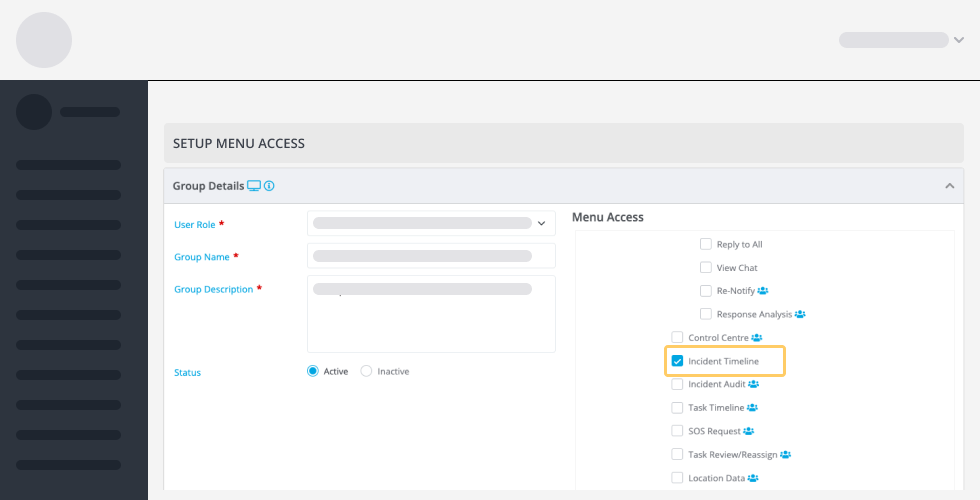
Menu Access Updated for Staff Users to allow access to the incident Timeline
We are excited to announce a significant update to the Staff User Menu Access, now providing staff members with the capability to access the incident timeline and effortlessly view all messages they were involved with.
This enhancement ensures that staff users have a comprehensive view of their engagement within an incident. By accessing the incident timeline, they can quickly review and analyse all the messages they were part of, enabling them to stay informed about the incident’s developments and their contributions to the communication.
New Warning for sending Message to a large recipient numbers
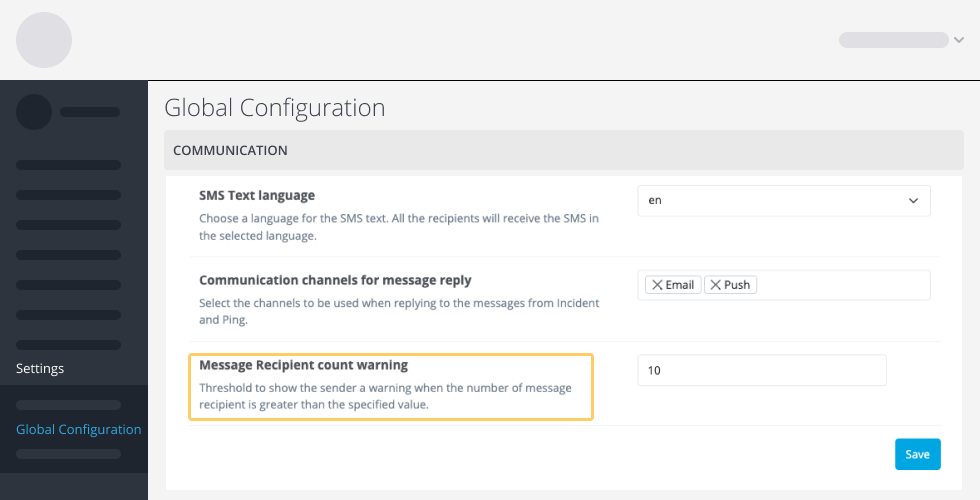
We’ve introduced a valuable new functionality that displays a warning message when a user elects to sends a message to a larger number of recipients. The warning message will act as a safeguard, prompting the user to review the recipients and content before sending the message. This helps avoid unintended mass communications and maintains the privacy and relevance of messages.
We have made this option configurable for system administrator in the Global Settings under the Communication tab.
Version 5.5.2.0 - 14 Mar 2023
Alert Emails Now Have Media Asset Attachments
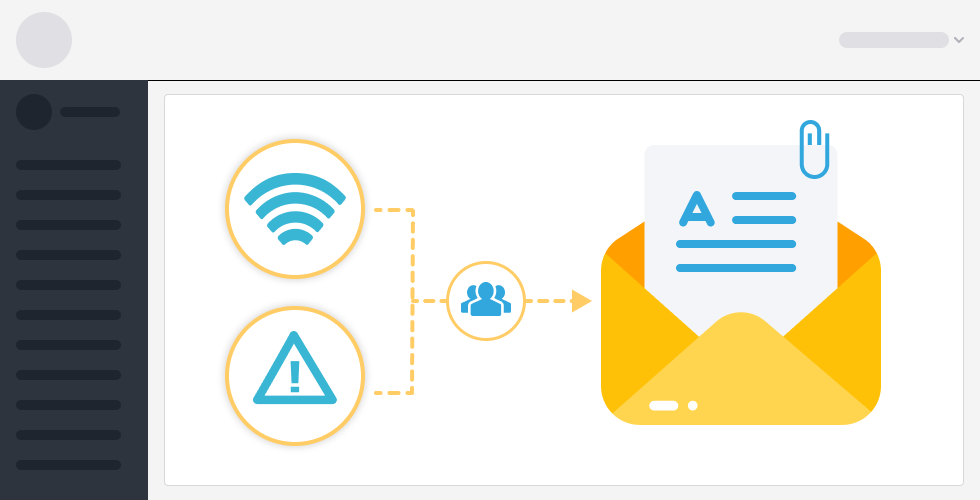
When you receive a PING or INCIDENT notification through email, you will now be able to view the attached media asset directly within the email. This means that you won’t have to go through the extra step of logging into the system during a crisis situation.
Version 5.5.1.0 - 24 Feb 2023
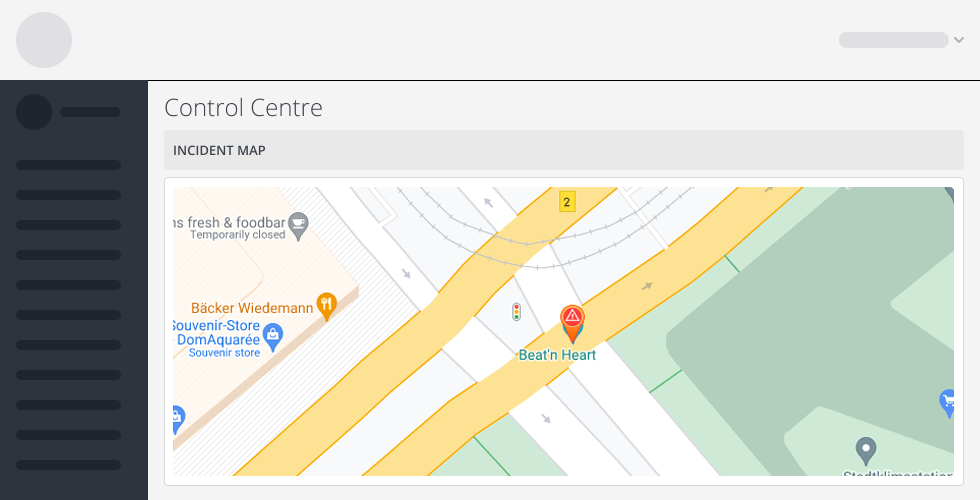
Control Centre Impacted Location dash-let to be more zoomed out
The location dash-let for incidents that are launched is usually zoomed in on the selected location, which can make it difficult to quickly identify the location. To improve usability, the location dash-let will now be zoomed out further, allowing users to easily identify the location without having to interact with the map to gain an understanding of the impacted area.
Bug Fixes
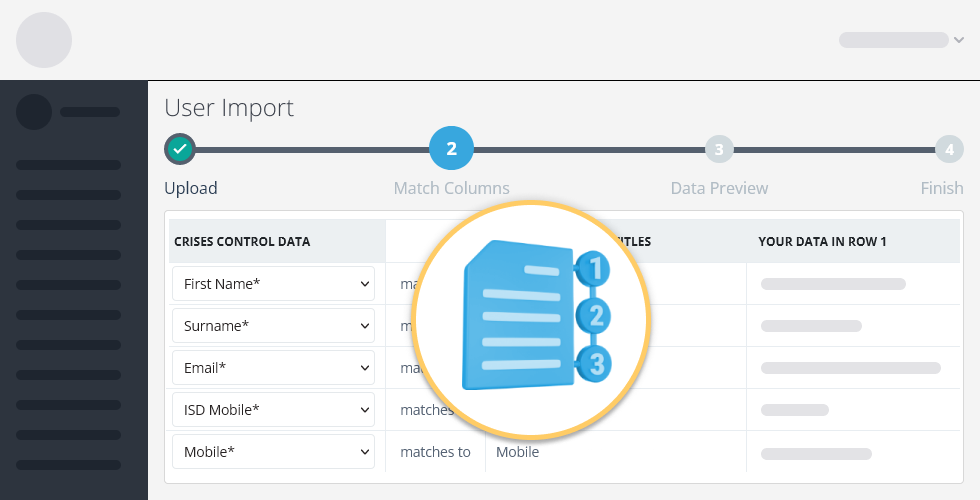
- A change has been made to the system that allows users to be imported with numbers in their surname. Previously, the logic, prevented the use of numeric characters in the surname field, but this restriction has been lifted.
- SFTP no longer requires you to save the job twice.
- Fixed an issue that prevented the use of locations with 3 DMS long in the "Incident @ Location" feature has been resolved and is now working properly.
- A change has been made to the "Trigger & Scheduled Ping" feature, where users can no longer upload attachments to messages that have been created.
- A warning message will now be displayed to users when trying to create a scheduled or trigger job for a ping that contains a message attachment. The user will have to remove the attachment before they can proceed with creating the job.
